Let me start by saying: I'm no Cook. Therefore, I did not choose any high-end anything for my kitchen, because food to me is just fuel so I can get back to wrangling kids, crafting or gardening. When we moved a year and a half ago, our new-to-us kitchen was smaller than the one we sold. It was also original to our new-to-us brick rambler built in 1977. Because I'm married to an extremely handy dude, we knew that we could make the kitchen into something we loved without breaking the bank (read between the lines: we are both tightwads). And so, I present our under $2000 kitchen makeover!
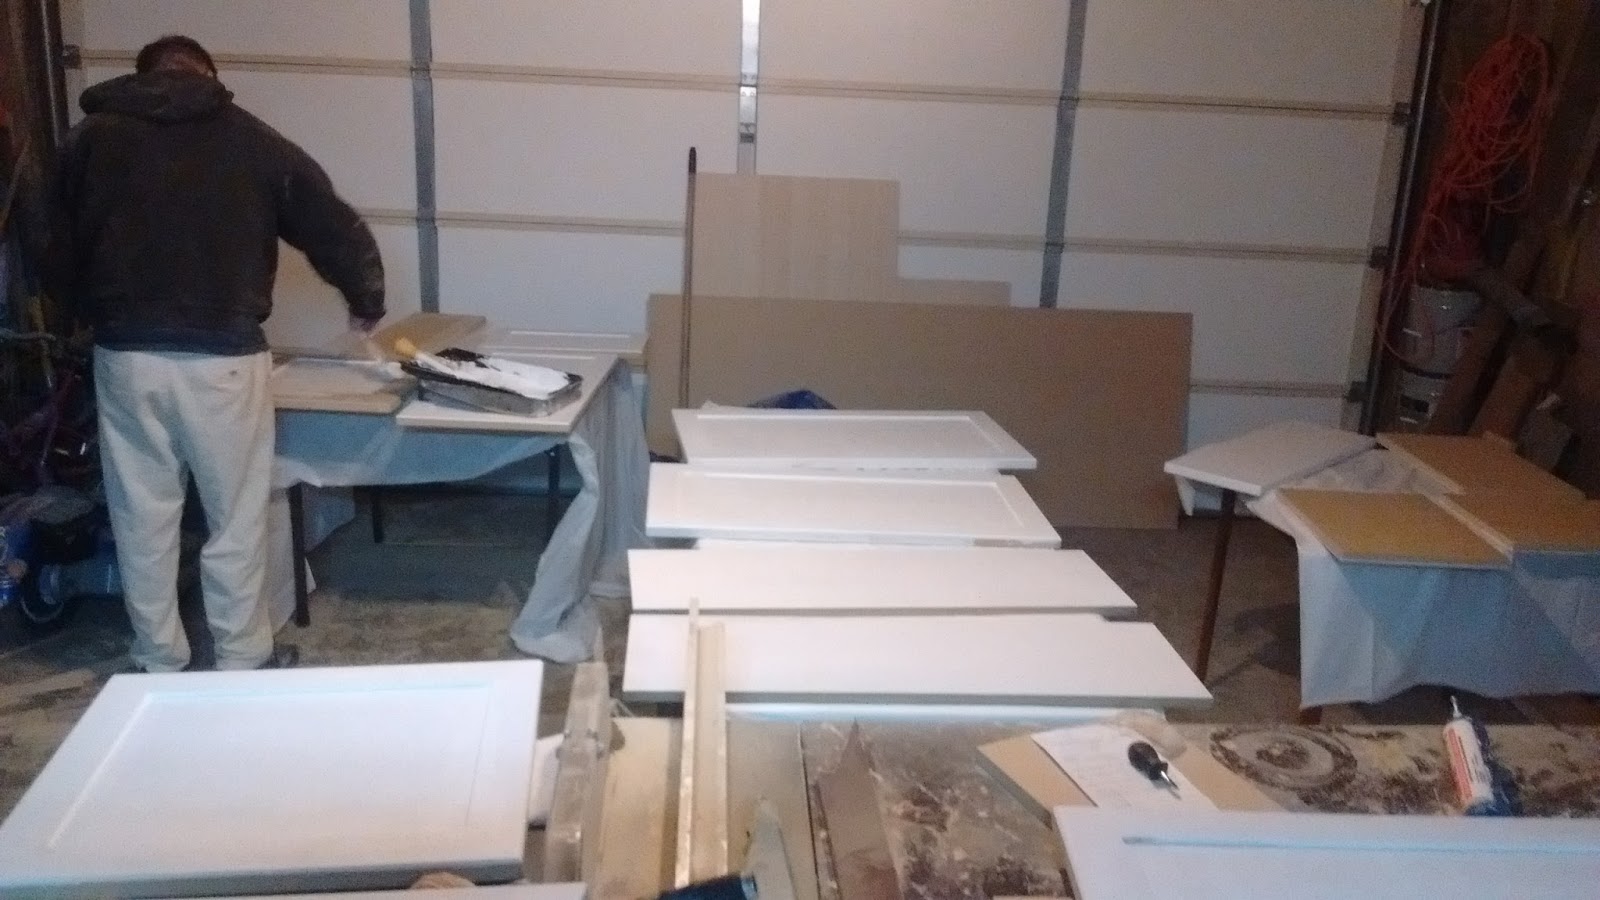
Here's the thing: You are expecting "before" pictures. But I don't have "before" pictures, because 1.)I hated the kitchen so bad I cropped it out whenever I could. 2.)We honestly don't spend most of our time there, but I have lots of shots in the living room! 3.)We kinda just got going on the renovation without cleaning up (as you can see). So enjoy these "during" pictures.
First up: We removed the bank of cabinets that throw shade on the entire countertop (they had doors on both sides).

Next, we removed the empty box the cabinets were attached to. WHY was that even there? Were people in the 70's that much shorter?

Then we patched the holes left after removing the useless box. We relocated the flourescent lights to rooms that needed them, put beautiful fan/light fixutres up, and installed the old cabinets over my hard working husband's tool bench. Re-use it ALL, baby!


My husband built all new upper cabinets from scratch. He chose MDF, and added 1/4" panels to the doors in the "Shaker" style. We used our car floor jack to help us mount them, because I'm not the burley broad I once was, and I'm the only help he's got.

The back of the cabinets is beadboard, and he scored BIG by finding 5 gallons of mistinted white paint for only $15! We added a few strips of 1/4" to the back of the snack bar, just for interest. I did most of the painting during my mini-tornado's naptime. Somewhere in here, we added crown molding around the top of all the uppers, but you'll have to look for it in a later picture.

Having a big project to focus on helped keep the S.A.D. (seasonal affective disorder or "winter blues") away. But using our garage as a woodworking and painting workshop was slightly challenging, since the paint required 60 degree temps for proper use. We fully insulated the garage right after moving in, so we left our poor cars out in the snow while we used heaters to make a good painting environment.
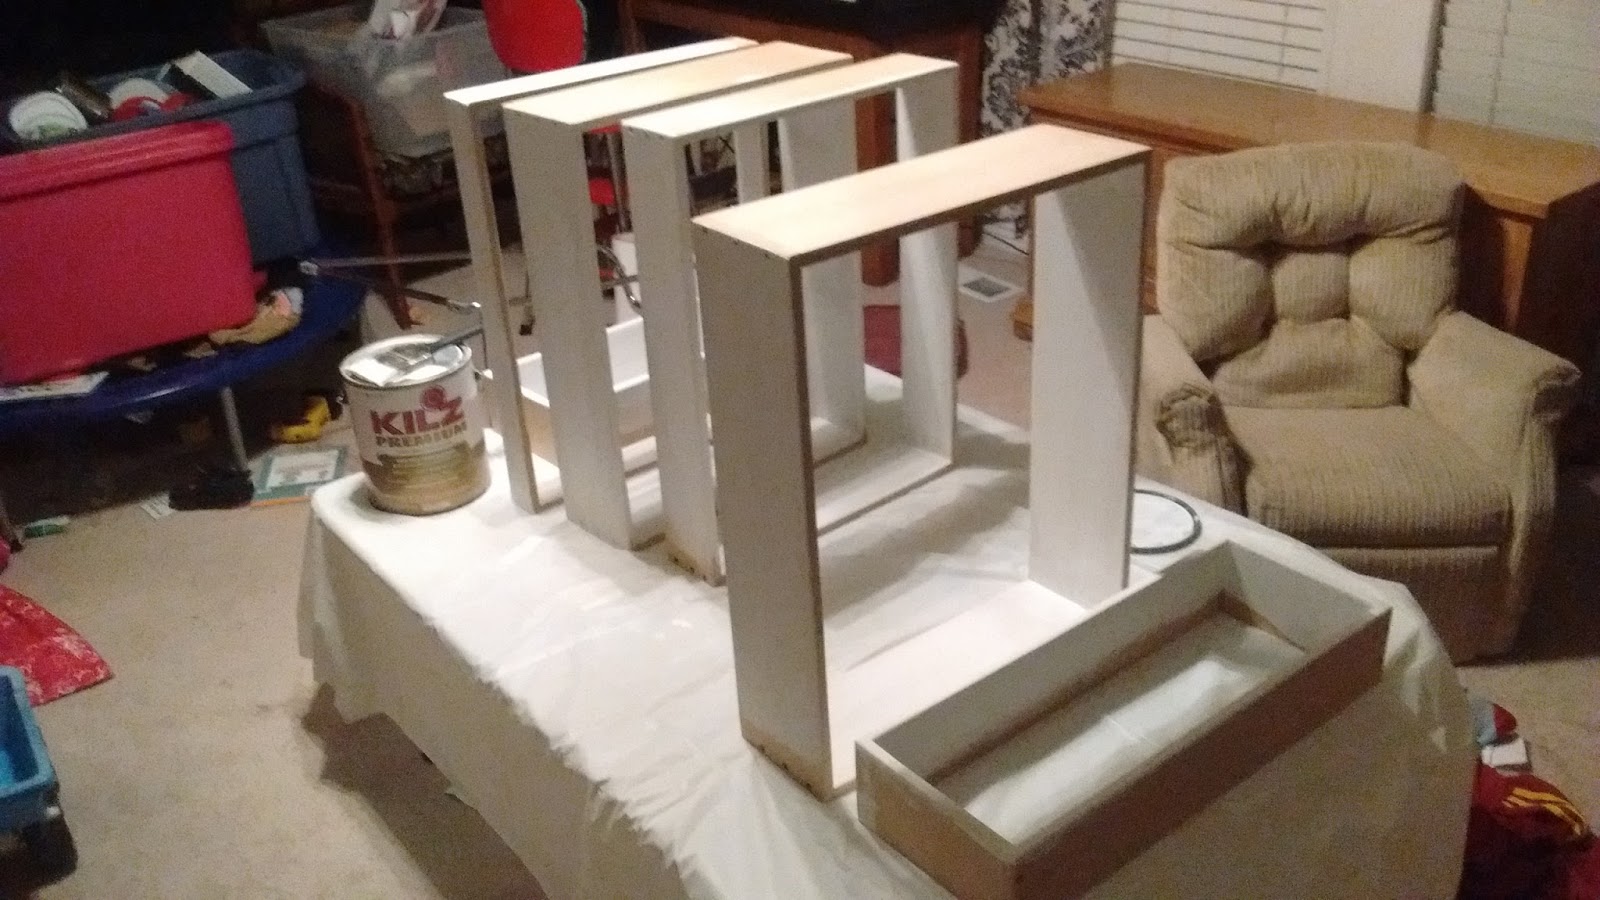
The old drawers had lots of wasted space, so my Handyman decided to build those all new. We also made new doors for the lower cabinets, but we didn't demolish the main frame of the lowers. We did, however, spend a bit of time and effort evening them out, fixing gaps, and adding shelving inside them. I even got away with painting in the Living Room one night when all four of my monsters were sleeping.

Then we took a deeeeeep breath and dove into the countertops! I was ready to put up a fight to get what I thought I wanted (solid surface...no laminate!). But my husband fights dirty, and bribed me with a new sewing machine if I would agree to laminate that didn't look like laminate, but was 1/10th the price of other options. I remind you again, I don't cook, but I do sew. If I cooked well or often, high end finishes might make sense. So... we made our own countertops with *gasp* laminate... that looks like marble, and used special bullnosed edging made to match.
Goodbye yellow... the color of Jaundice! (reference to a comedy sketch by Studio C)
Goobye permanently stained sink and faucet that no longer swiveled!

Cut and "dry-fit" the substrate (particle board).

Cut laminate to match substrate.

Glue the two layers together and roll out the air bubbles. Another go with the router to make all edges perfectly square.

Install the behemoth pieces and then add the rounded edging.

Finished countertop! The reinforcing tape just held the edges while the adhesive dried. It looks so much better than I feared it would, The white reflects even more light from the tube skylight we installed
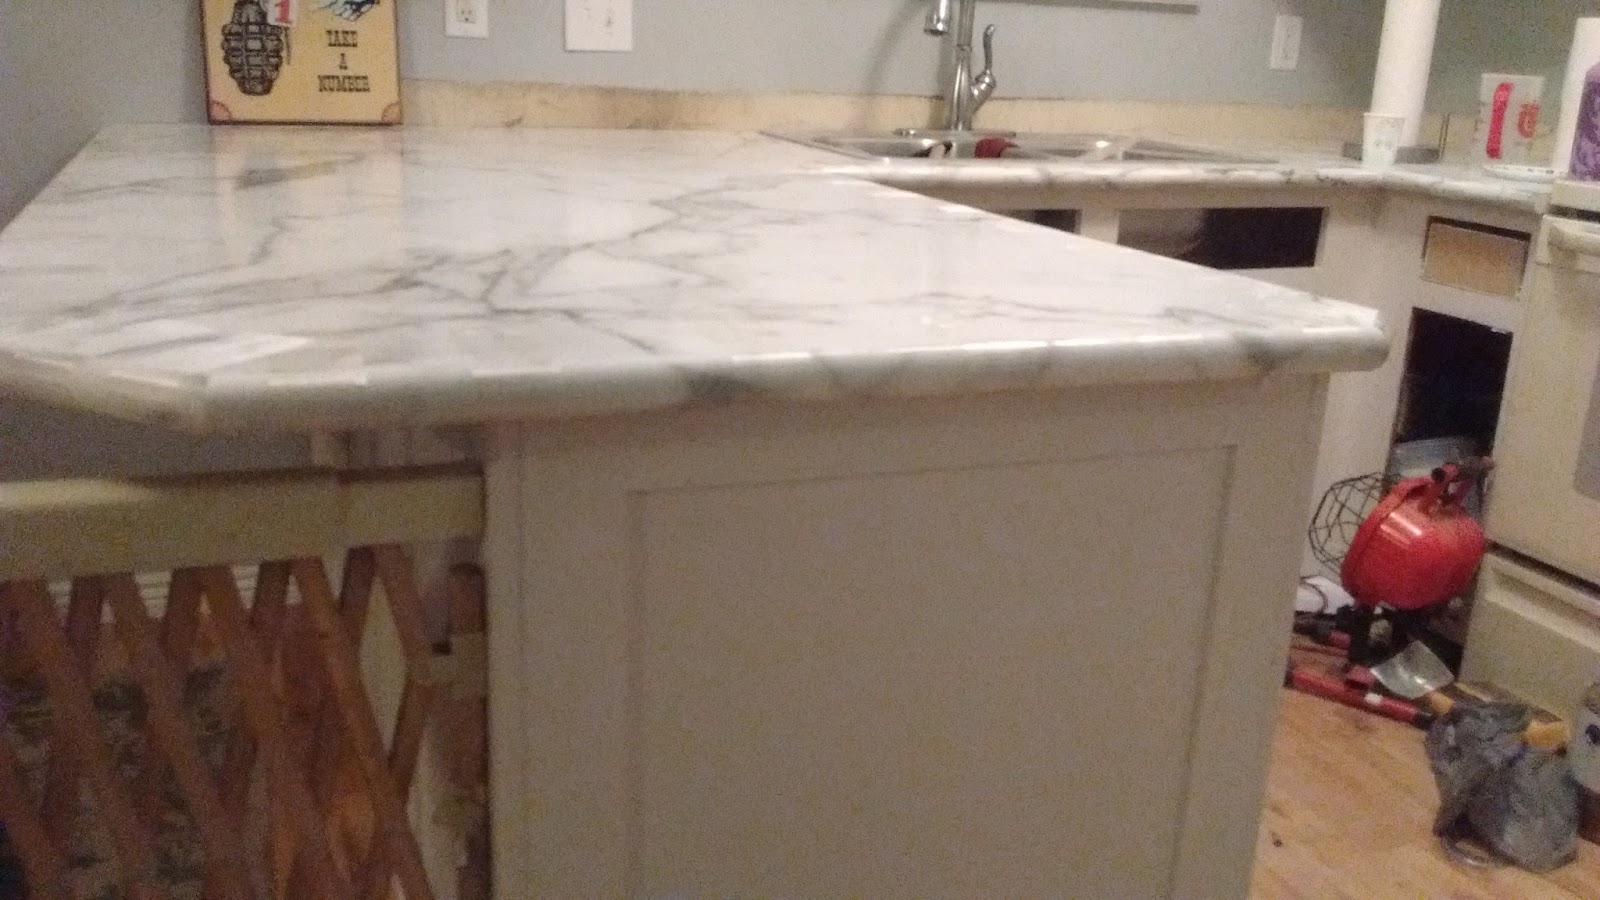
I got all the handles a few years ago at a thrift store...brand new in the package. All the ones we needed plus MANY more cost me just $28! Thank you to whomever donated them! Also, I HATED the floors and was sure I wanted them sanded and stained darker. But now...I like them! They are staying light. This whole project transformed a very dark, gloomy kitchen into a room so bright during the day that I don't even need lights.

I stole this next little trick from my in-laws. Tilt-out panels in front of the sink! I love them. A little place to keep scrubbers and such, so they can be out of sight but still handy.

Lastly, we installed a backsplash. I fell in love with what is actually a floor tile. It's made of porcelain, but screen printed to look like weathered barn wood. My maternal grandparents lived on a dairy farm in Ucon, Idaho, and every building on their property had beautiful old-looking wood like this someplace on it. I know Farmhouse style is popular right now, but I love it because it feels like I'm honoring my roots. I will still love it long after it's not trendy anymore. The tile still needs to be grouted, but today is the day I decided to blog, so... no grout!


That's the end of my kitchen renovation story. It's not glamorous. It's not expensive. But it now feels LIGHT. It feels calm. That's what I need from my space, and I'm so humbled my man worked so hard alongside me to make it happen. I'm so very blessed.
Simple Abundance!
3 comments:
I love looking at before and after shots. It's instant gratification without living through the work and mess 😄 Looks awesome, great job!
It looks so pretty!! I love your new kitchen!
All I can say is WOW!
Post a Comment